Rainbow Diamond
Accent Pillow
Single Crochet in Pastel Shades
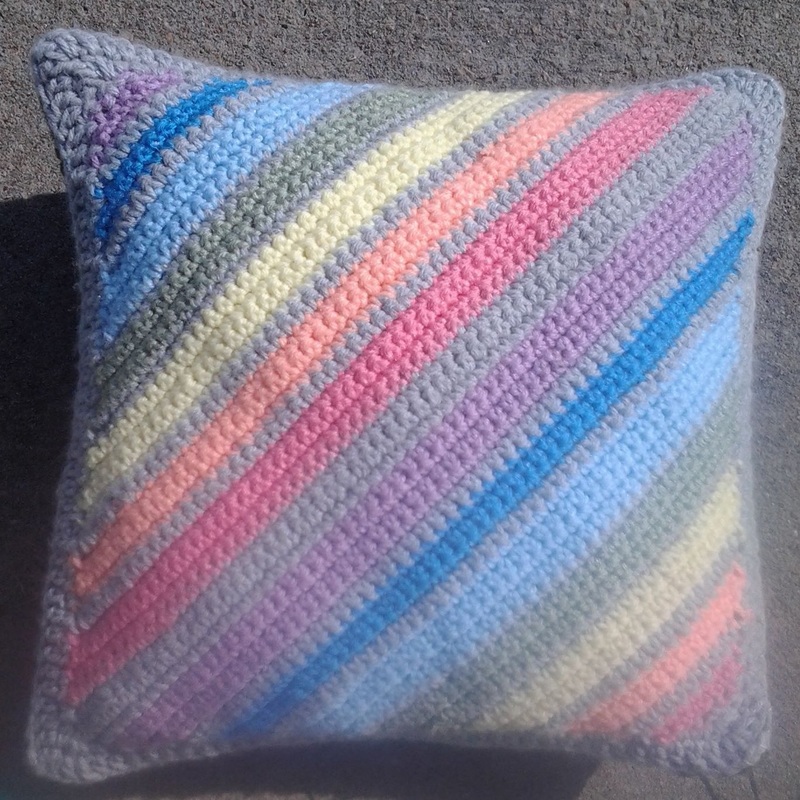
This is the pattern to make a 14 inch accent pillow. I have also included the instructions for making the back piece of the pillow as well as the crocheted front piece.
Materials Needed
- F Hook (3.75 mm)
- Stitch markers
- scissors
- Yarn needle (for burying the ends)
- Yarn (worsted weight/ 4) in the listed colors
- 14 inch pillow form
- Heat'n Bond Ultra Hold Iron-On Adhesive-5/8" OR Sewing machine OR Serger/Overlock Machine
- Iron
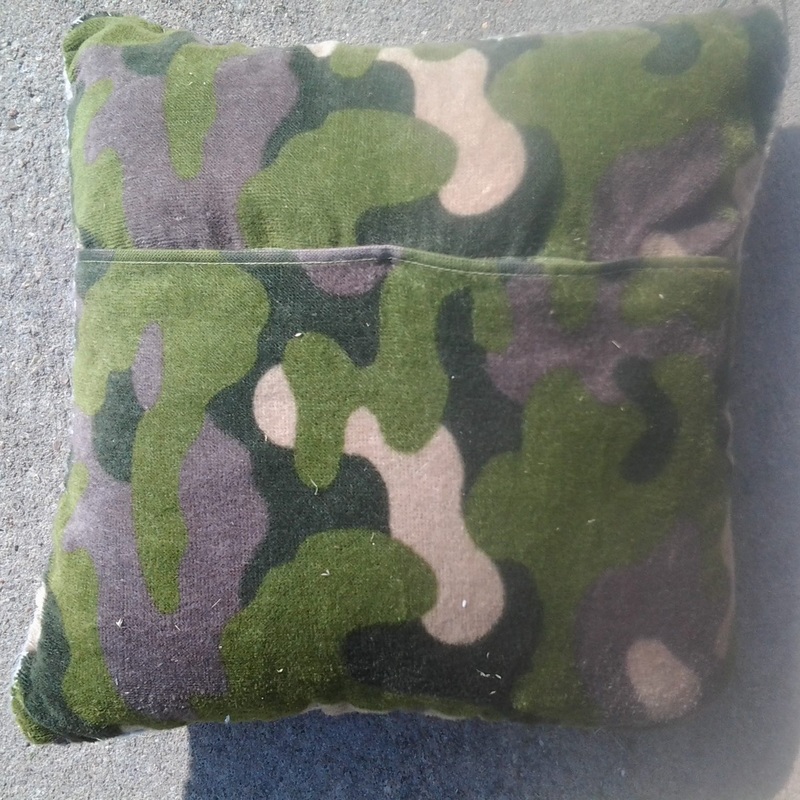
- fabric for backing of pillow. (I used a camouflage towel for the backing.)
- Sewing/hem gauge
- sewing needle
- coordinating sewing thread to match contrasting color.
Pillow Front
|
|
| A | Red | I | Light Blue |
| B | Perfect Pink | J | Royal Blue |
| C | Pumpkin | K | Delft Blue |
| D | Country Peach | L | Navy |
| E | Bright Yellow | M | Orchid |
| F | Pale Yellow | N | Dark Orchid |
| G | Frosty Sage | ||
| H | Meduim Thyme | CC | Soft Grey Mix |
|
|
| ch | chain | sc | Single Crochet |
Instructions
You will be making this from the center contrasting color to the corner point. Once you have completed one side, you will work the other side from the starting chain to the other corner point, reversing the color pattern.
When changing colors, insert new color on last step of sc from previous row.
When changing colors, insert new color on last step of sc from previous row.
| Color | Row | Stitches | Stitch Count | |||||
| CC | Chain 68, turn | |||||||
| 1 | sc in second from hook, | 66 sc, | ch1, turn | 67 | ||||
| 2 | sc in second from hook, | 64 sc | ch1, turn | 65 | ||||
| M | 3 | sc in second from hook, | 62 sc | ch1, turn | 63 | |||
| 4 | sc in second from hook, | 60 sc | ch1, turn | 61 | ||||
| 5 | sc in second from hook, | 58 sc | ch1, turn | 59 | ||||
| 6 | sc in second from hook, | 56 sc | ch1, turn | 57 | ||||
| CC | 7 | sc in second from hook, | 54 sc | ch1, turn | 55 | |||
| K | 8 | sc in second from hook, | 52 sc | ch1, turn | 53 | |||
| 9 | sc in second from hook, | 50 sc | ch1, turn | 51 | ||||
| 10 | sc in second from hook, | 48 sc | ch1, turn | 49 | ||||
| CC | 11 | sc in second from hook, | 46 sc | ch1, turn | 47 | |||
| I | 12 | sc in second from hook, | 44 sc | ch1, turn | 45 | |||
| 13 | sc in second from hook, | 42 sc | ch1, turn | 43 | ||||
| 14 | sc in second from hook, | 40 sc | ch1, turn | 41 | ||||
| 15 | sc in second from hook, | 38 sc | ch1, turn | 39 | ||||
| CC | 16 | sc in second from hook, | 36 sc | ch1, turn | 37 | |||
| G | 17 | sc in second from hook, | 34 sc | ch1, turn | 35 | |||
| 18 | sc in second from hook, | 32 sc | ch1, turn | 33 | ||||
| 19 | sc in second from hook, | 30 sc | ch1, turn | 31 | ||||
| CC | 20 | sc in second from hook, | 28 sc | ch1, turn | 29 | |||
| F | 21 | sc in second from hook, | 26 sc | ch1, turn | 27 | |||
| 22 | sc in second from hook, | 24 sc | ch1, turn | 25 | ||||
| 23 | sc in second from hook, | 22 sc | ch1, turn | 23 | ||||
| 24 | sc in second from hook, | 20 sc | ch1, turn | 21 | ||||
| CC | 25 | sc in second from hook, | 18 sc | ch1, turn | 19 | |||
| D | 26 | sc in second from hook, | 16 sc | ch1, turn | 17 | |||
| 27 | sc in second from hook, | 14 sc | ch1, turn | 15 | ||||
| 28 | sc in second from hook, | 12 sc | ch1, turn | 13 | ||||
| CC | 29 | sc in second from hook, | 10 sc | ch1, turn | 11 | |||
| B | 30 | sc in second from hook, | 8 sc | ch1, turn | 9 | |||
| 31 | sc in second from hook, | 6 sc | ch1, turn | 7 | ||||
| 32 | sc in second from hook, | 4 sc | ch1, turn | 5 | ||||
| CC | 33 | sc in second from hook, | 2 sc | ch1, turn | 3 | |||
| 34 | sc in second from hook, | tie off | 1 | |||||
Border
Rnd 1: Using CC sc around the entire pillow face, doing 3 stitches in each corner.
Rnd 2: dc in each sc around entire pillow, making 3 stitches in the corners.
Rnd 2: dc in each sc around entire pillow, making 3 stitches in the corners.
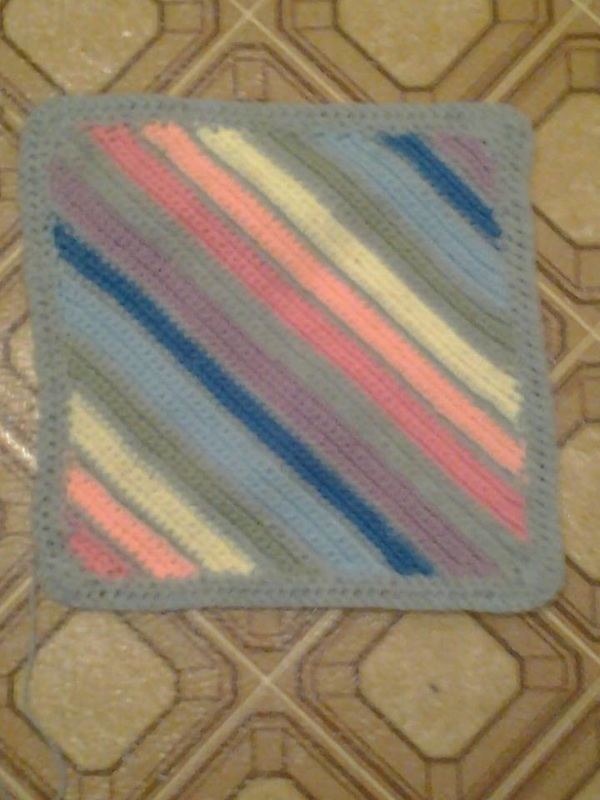
Pillow Front
Pillow Back
Using the Camo towel, cut just above the hem to make a raw edge on the end spanning the narrowest side. Discard this strip. Cut a strip of the towel 16 inches wide and
spanning the width of the towel. From
this strip, measuring from the hemmed ends to the center, cut 1 piece that is 11
inches ( 11 X 16 inches) and cut one
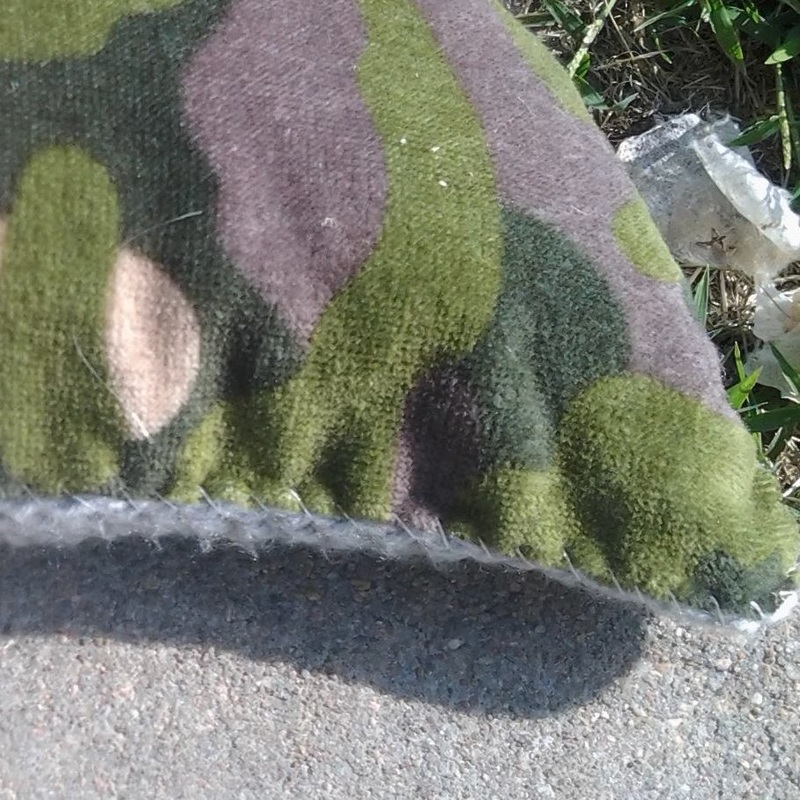
from the other end that is 7 inches ( 7 X 16 inches). Make sure you include the hems in the measurements. Place the two pieces, right sides down, with
the pre-hemmed edges overlapping 2 inches.
This will create the slot for inserting the pillow form, like you would
have on a sham pillow. Pin together at
the overlap to stabilize
Making the Hem
Using a sewing/hem gauge, make a 1 inch hem along all 4 sides, mitering the corners.and pinning in place. Press the edges to try to create a crease.
No Sew Method
Place Heat n Bond adhesive tape along the raw edge of the folded hem, but inside the pocket formed from the ironing. Iron into place leaving a small gap at the bottom of the fold. It is important to have the gap for later steps.
Sewing Machine Method
After completing the folding and ironing in the “Making the Hem” step, fold the raw edge into the fold to create a double fold hem, leaving it a bit off so there is a small gap at the initial crease from the ironing.
Serger/Overlock Method
After completing the folding and ironing step above, mark 3/8 of an inch from the fold towards the outer edges. Mark this line with a fabric marker or taylor’s chalk, mitering the corners. Serge/Overlock at the drawn line (making sure to make the corners sharp and not rounded)letting the machine trim off the excess as you sew it.
Connecting the two pieces
To attach the crocheted piece to the backing fabric, use a sewing needle and matching thread to sew together using a whip stitch. Go around the yarn on the outer stitch of the double crochet and go thru the little gap from the hem process. If you serged/overlocked your backing fabric, when attaching the two together whip stitch just inside the serging threads to conceal them.
Copyright 2015 by Taune Lynea
